Skip navigation

Category Archives: Pontifications on the Practice of Picture Preparation

The 5×7 format is a bit of an odd duck. It’s a surprising amount larger than 4×5, in terms of film area (and makes for a good contact print size), and it’s substantially smaller (and thus easier to carry around; cheaper to purchase) than 8×10. 8×10 is a great choice when gigapixels are required — you can blow up an 8×10 negative to billboard proportions and it’s still quite clean.

However, I have so much experience with 35mm sized lenses that I found myself getting lost thinking about which lens length in 5×7 is equivalent to what length in 35mm. I know, it’s a horrible crutch, but I instinctively know that (for instance) 85-100mm is the length of lens I want for shooting portraits in 35mm.

So, to help get it right in my head, I just sat down and calculated out the actual lens to film relationships between a few different lenses. This of course as I ponder whether I want to find more 5×7 lenses (they’re shockingly expensive for being moribund technology).

Here, then, are the numbers I just worked up, for posterity.

35mm Film (43.27mm diagonal)
Lens length % of film diag
24mm 55.4%
50mm 115%
85mm 196.4%
100mm 231%
5×7 Film (222mm diagonal)
Lens length % of film diag
120mm 54%
210mm 94.6%
360mm 162%
500mm 225.2%

If you find yourself feeling limited by the camera in your phone, chances are you’ve thought about buying a better camera. Something with a bigger sensor for better low-light performance, or shallower depth of field. Maybe the ability to switch lenses for different situations.

Very likely, you’ve taken a look at the field of Digital Single-Lens Reflex (DSLR) cameras available, clutched your head in agony, and wondered where to start. This article does not discuss or recommend specific cameras, but rather gives you a bit of insight into how these cameras are marketed, and what their strengths and weaknesses tend to be. Using this knowledge, you will be able to look at what’s on offer and have some understanding of what the different models are for, and why you might want them.

The Broad Categories

DSLR cameras come in three general types: Consumer, Prosumer, and Professional. You can tell these apart right away by their suggested retail prices or street prices. Generally speaking, the consumer cameras are comparatively inexpensive — right now, that translates to about $400-800 for a kit with the camera, a lens, and a couple accessories like a bag or an inexpensive tripod. The prosumer cameras cost more, usually from about $800 up to about $2000, sometimes for a kit, but usually for just the camera body with no lenses. The professional cameras pick up around $2000 and go up, up up. These price values may not be valid any more as you read this article, so keep in mind this was late 2017. Unless the market changes dramatically, though, something like these three classes will continue being available for at least a few more years.

Consumer cameras are generally more lightly built, and have fewer features than the more-expensive bodies, but not a lot fewer. In fact, the consumer cameras are frequently so featureful that it simply doesn’t make sense to progress beyond that level. A key element of this is that you will see practically no difference in image quality between the different levels of cameras. There are some exceptions, but for most photographers, a current consumer-level camera is a fantastic tool that will do everything you want it to. Keep that in mind as you look around: the image quality from a $400 SLR is about the same as the image quality from a $4000 SLR. (To be strictly accurate, they’re not the same, and you do get slightly better image quality from the higher quality cameras, but certainly not 10x better images.)

Prosumer cameras are a blend of the consumer and professional cameras, as their name implies. They’re intended for people who are really serious about photography, and who are willing to drop some serious cash on their hobby. They will generally have heavier construction to take more abuse, and more features that make taking good photos easier. The image quality will bump up a little bit, but not by much. What the prosumer cameras really get you is a refinement of features. Things like more autofocus points (which makes focus easier, or more likely to work in low light, or easier to customize to your exact shooting situation), or smarter exposure measurement (which means the photo is more likely to come out like you want, instead of with some element horribly over- or under-exposed). Frequently, the prosumer models will offer easier control of more aspects of the camera — fewer menus to dig through, and more buttons and knobs that just do a thing like switch modes, or control exposure, or set autofocus modes or points.

Professional cameras are cameras with eye-watering prices and a long list of features that, if you’re earnestly reading this article, will make little to no sense to you. That’s ok, it’d be a terrible waste of money to step from a cellphone camera to a professional DSLR. If you’re absolutely rolling in cash and are only willing to have the best, this is the category to aim for, but things get trickier here. The market has recently started specializing a bit more, and that’s most apparent in the pro cameras: cameras with very high pixel counts for landscape work that don’t do well in a studio, cameras that are super-optimized for sports photography, cameras that will only shoot in black and white, etc. There are still many generalist cameras at this level, but by the time you’re looking here, you should already know what you want and why you want it, and my little article should be completely redundant to you. Professional cameras will have vast swaths of features you never use, and which may make operating the camera more confusing than a consumer or prosumer model.

Let Me Re-emphasize: Image Quality

The most important point of this article, the thing I want you to take away from it, is that

You Can Make A Good Picture With Any Camera

From a cellphone (within reason, there are some terrible phone cameras) to the most expensive medium-format $50,000 digital camera, they’re all capable of turning out really good photos. The image quality from the least expensive modern DSLR is many times better than film for a given ISO (light sensitivity). The cost of the camera (as long as we’re discussing modern DSLRs) does not determine how good the picture that appears on your screen will be. The more you pay for the camera, the easier it will be to make that excellent photo, but they’ll all make an image you could put on the cover of National Geographic if you do your part.

A Word on Megapixels

It’s lessened in recent years (thankfully), but there was once the War of the Megapixels. Every manufacturer loudly touted how many megapixels their camera was able to capture, and legions of people bought the camera that had the highest number. Thing is, this is a silly number to obsess over. A 1200×800 pixel image is huge online, and most pictures you see on Facebook or Instagram are fewer pixels than that. A 1200×800 image is just under 1 megapixel. If you’re shooting photos to post online, and your camera shoots more than 1 MP (most shoot in the 16-24 MP range these days; even cellphones routinely shoot 8-16 MP now), you’re set, 16-24 times over. A 5×7 print image is a bit over 3 MP at 300 dots per inch (DPI).

There are a number of arguments for More Megapixels, and they are quite valid (I’ve upgraded my camera specifically to get more pixels, in recent memory). The big one is for print. If you want to make a photo into an 11×17 poster, which has been my use-case, you’ll want to print that photo at 300 DPI (or even more), and that means a 16 MP camera is the smallest you can use without scaling the image (which can easily destroy image quality). Another excellent use of Moar Pixels™ is that you can crop your image and still have a very high-quality image left over.

The trade-off for having more pixels is that the image quality tends to suffer as you pack more sensors onto a chip. To some extent technology is solving that, as demonstrated by the very high-MP cellphone cameras that are actually quite good.

Megapixels should not be your overriding concern unless you know for sure you’ll need them. Any modern DSLR will meet your needs the vast majority of the time.

A Word on Brands

As of this writing, and for many years already, there are only two brands of DSLR that are considered the main contenders: Nikon and Canon. Each brand has its boosters and its detractors, and people can get very heated about it, but the real truth is that they’re both really good. They have different strengths and weaknesses, and it’s worth figuring out what you want to do, and which brand aligns with your interests, but either one is likely to be a good system for you. I strongly recommend that you not just shop online for your first DSLR, but actually go to a camera store and play with them. You may find that one simply Makes Sense™ to you and the other one doesn’t. That happened with me, and I ended up in the Canon side of the house, but I can clearly see that Nikon also makes fantastic cameras.

The one thing to keep in mind is that your progression, should you get excited enough about photography to progress beyond your first DSLR (and it’s ok if you don’t!) is that you’ll find yourself collecting lenses. Once you do that, you tend to be committed. Nikon lenses don’t fit on Canon bodies and vice versa. There are adapters out there, but it’s not the same, and you shouldn’t expect the same performance. So if you start down one brand’s path, you’ll probably stay on it unless you dig losing a lot of money on lenses when you switch.

Lenses are More Important

It seems a bit non-sensical at first, but it’s true: lenses are more important than cameras. Lens technology is stable, without much churn. You can buy a lens from 20 years ago that will still work on a modern Nikon or Canon body, and will produce stellar images (sometimes literally, if you’re doing astrophotography). The lens you buy today will almost certainly work on the new body that Nikon or Canon come out with in 20 years. DSLRs aren’t really going away as a class of camera, but the camera tech changes yearly. You will buy a new body in 2-3 years if you get serious about it, and then probably every 2-3 years after that.

To be sure, there are advances in lenses all the time, with faster and quieter focus motors, and better coatings on the glass, and interesting new designs popping up. But because of the rate of change, and the fantastic quality already present in the lenses, consider your DSLR body to be relatively disposable compared to the lenses.

This means that when you’re considering the purchase of your first DSLR, it actually makes sense to spend as much or more on the lens as you do on the camera. This idea subverts the marketing of these cameras, since they promise to be all-singing and all-dancing, but a camera body is useless without a quality lens. The kit lenses are usually decent, but suffer, sometimes badly, from lightweight construction. They’ll take good photos, but don’t expect them to last long. Plus, more so than the camera bodies, you will see a real improvement in image quality by using a higher quality lens.

Also, Mirrorless

When you’re looking at a new camera, it’s well worth looking at mirrorless designs as well. These cameras have really taken off in the last decade, and they’re improving rapidly. This also requires a shift in terms: Canon in particular isn’t much of a contender here, Nikon is more present, and Sony is off the charts from what I’ve seen. Olympus and Panasonic and Fujifilm are all making strong showings. I’m not as familiar with this market, so I can’t offer any real advice, but I’ll say that I have an Olympus OM-D E-M5, which is a ~5 year old Micro Four-Thirds camera, and still really like it as a walking-around camera.

Mirrorless cameras offer good value, rapidly improving picture quality, and rival or beat their SLR competitors in many ways. They have the advantage of being smaller and lighter, which is a real boon when you have to carry the thing for an entire day. I have the impression there’s not as much of a consumer/prosumer/professional divide, though that may be developing as the market matures.

Last time I looked, the biggest negative point for mirrorless cameras was that the selection of lenses was small compared to what’s available for the SLRs. The market simply hasn’t been around for long enough. There are excellent lenses available, but the breadth of focal lengths and maximum apertures is lacking.

Consider Used

Used cameras (and used lenses) represent a ridiculously good value. I mentioned above how you’re probably going to upgrade your camera body every few years? So does everyone else. This means that there is a robust and underpriced used-camera market out there. For example, I bought a new 1st-generation Canon 7D when it had been on the market for about a year, for $1200. I sold it to a friend four years later for $400, but I wouldn’t have gotten much more than that on Ebay. My first DSLR was a Canon XTi, which I got for around $600 in a kit, and sold about five years later for $50 to a friend (it was worth more than that, probably $100-150, but even so). A 3-year-old prosumer camera will set you back the same amount as a new consumer camera, or even less. If you can stomach not owning the latest and greatest, used cameras are fantastic value for the money.

Online Resources

For the first and last word on camera reviews (including any used DSLR or lens you might come across), go to DPReview.com

For very high-quality used cameras and lenses at better-than-Ebay prices, check out KEH

For all the new gear, and some of the used gear, meander on over to B&H Photo and Video and Adorama Camera

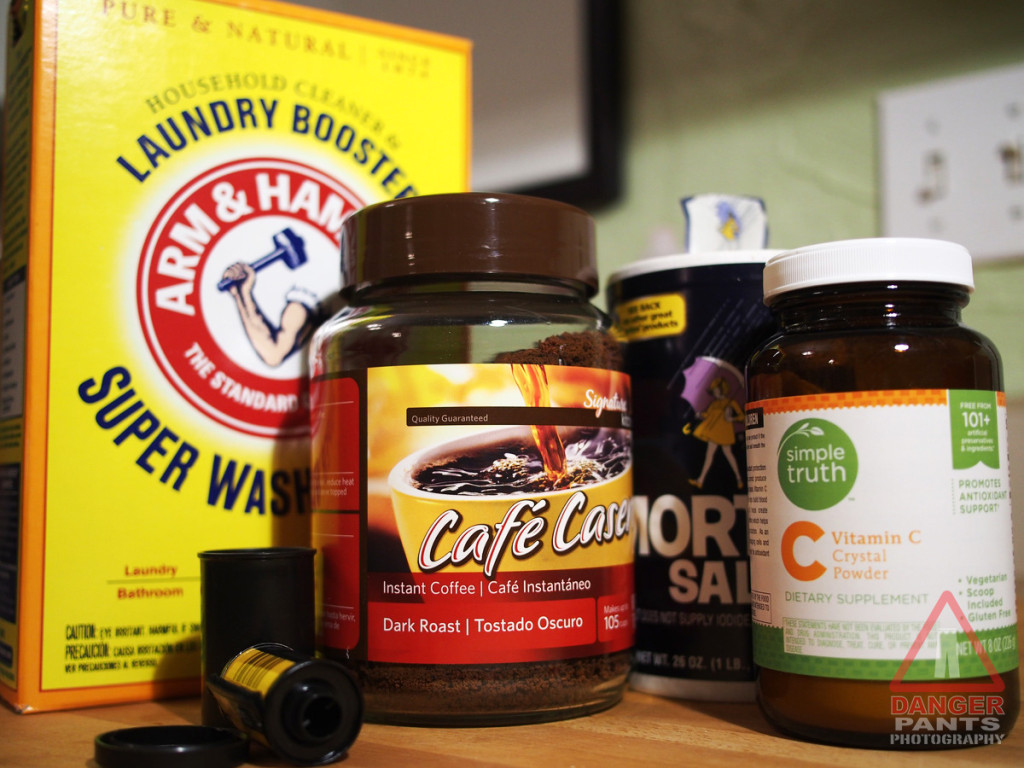
I was trolling through some film resources online a month or two ago, and I came across a mention of Caffenol as a developer. Wait a minute thought I, what’s this Caffenol about? That doesn’t sound like a commercial developer…

How right I was! Caffenol is actually a completely home-made film developer, which uses instant coffee as its active ingredient. As soon as I read the description, I had to try it. I dashed off a roll of Ilford HP-5+ 400 ISO 35mm film that I wouldn’t be sad to lose to a bad process, and finally tonight I put together the ingredients, and developed my disposable roll.

The process of mixing Caffenol (I tried for the Caffenol-C-H recipe, though I used insufficient salt after mistakenly thinking it was iodized) is straightforward, and anyone who can afford a cheap digital scale ($10-15 online) and the raw ingredients can put it together. Using it is a bit odd: I’m so used to developer being clear that it felt wrong to pour this pitch-black liquid into the tank. I used the recommended 15 minutes with agitation, though I washed the film a couple times in water before pouring the stop bath in (not wanting it to come out with coffee color, since I reuse my stop bath).

Other than your development process smelling like bad coffee, it was exactly like developing with the XTOL I’m used to.

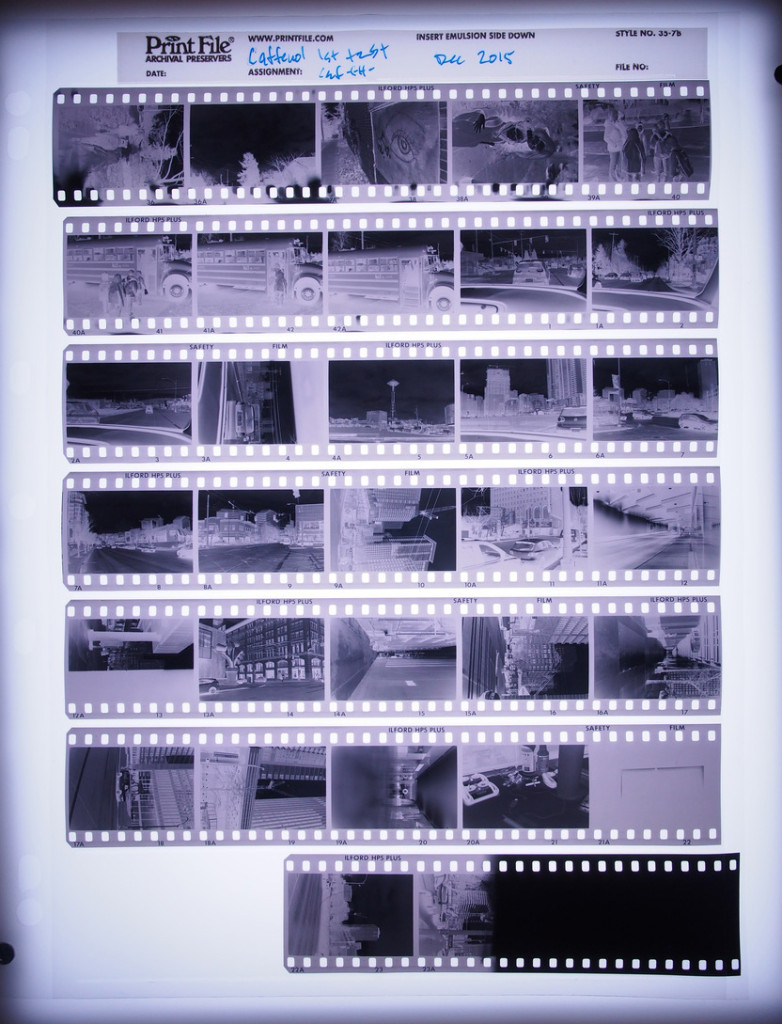
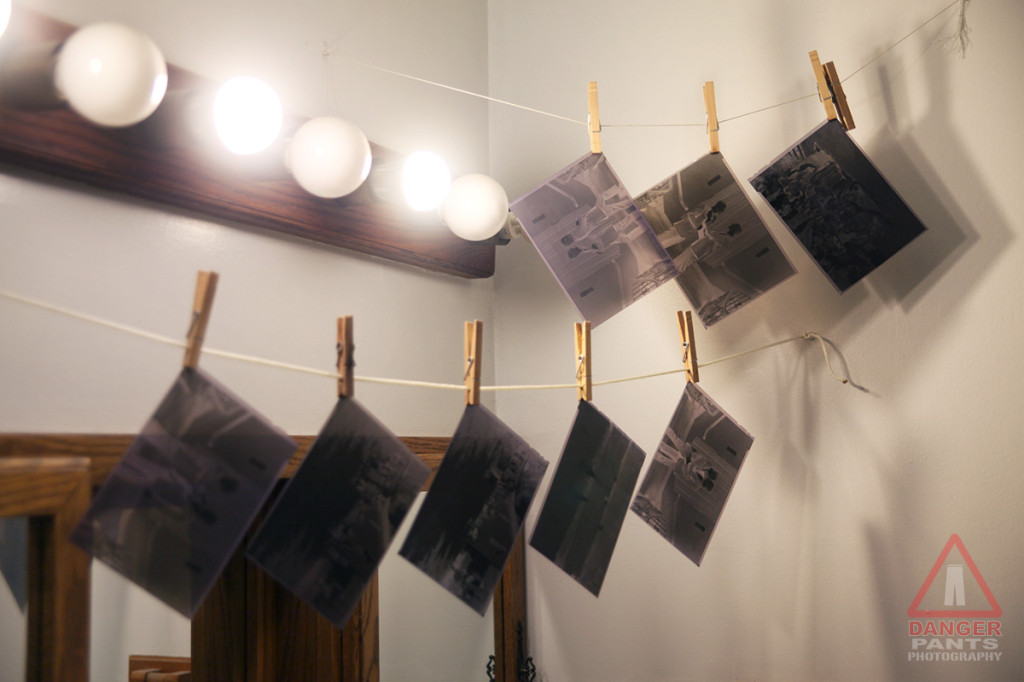
As a point of comparison, here’s a light table photo of the negatives I developed tonight:

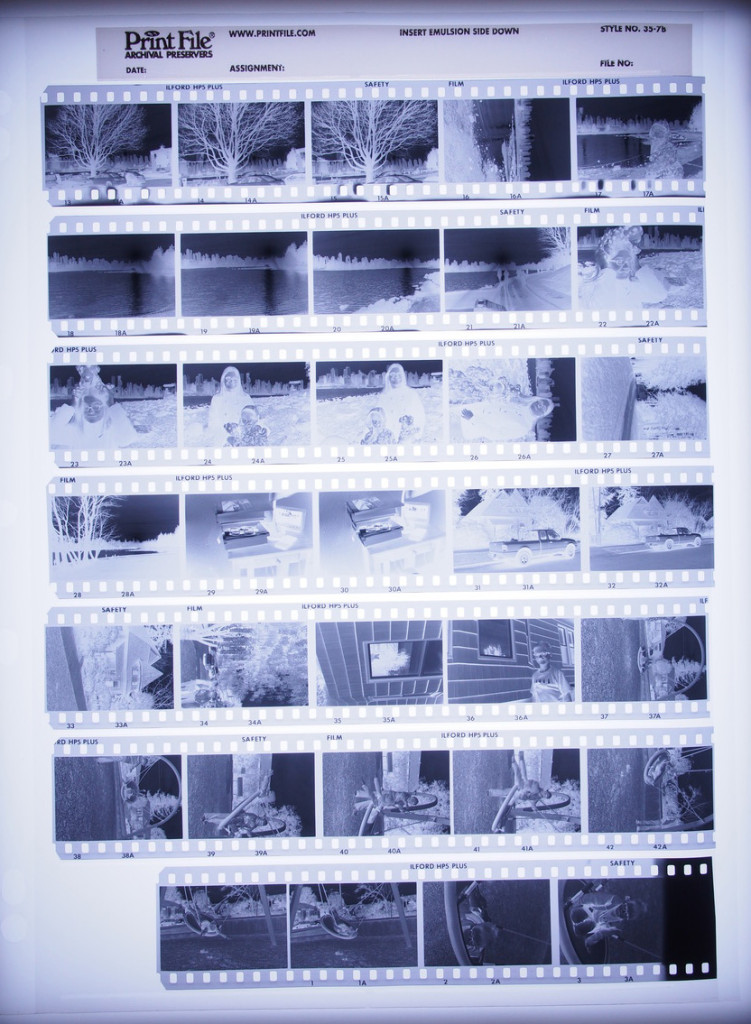
And here is a set of negatives from earlier in the year, developed in XTOL (both pictures shot with the same exposure):

As you can see, the base fog (darkness of the unexposed film stock) is pretty pronounced with Caffenol, but I also used half the amount of table salt I was supposed to (which is specifically to control base fog), so I don’t take this as anything more than a mistake on my part. The shadow detail looks pretty good, and the highlights look very solid.

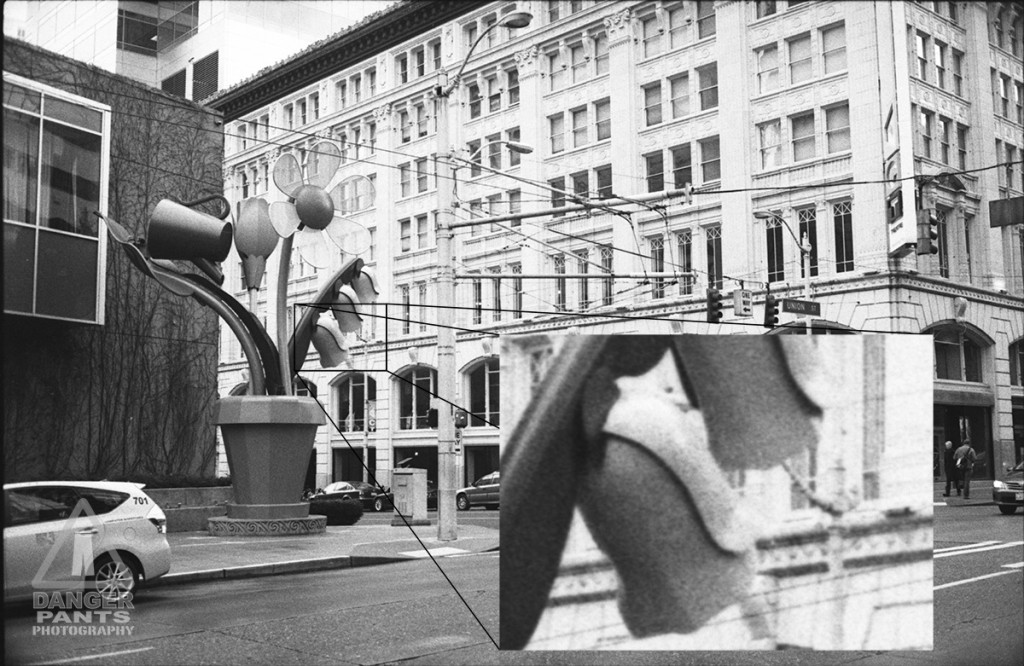
The scanner has no problem with the film, and the scanned result looks reasonably good. Grain is present, but not substantially worse than XTOL-developed film (I see I also need to work on scanner focus, but that’s a separate issue). I’ve inset a 100% crop from the flowers in the sculpture to show the detail. This was scanned at 6400 DPI, though it has been resized for reasonable web use:

Overall, an interesting experience. Worth a bit more work to see what happens.

If you’ve ever processed sheet film in open trays, you’ve likely come across the same problem I had: negatives get scratched if you try to process more than one at a time (I’ve read that it’s possible to do, but I’ve never been successful). The temptation was always there, though, because processing one negative at a time is deadly slow. With my one water bath (the bathroom sink), I couldn’t presoak negatives at the same time I was washing processed negatives, for fear of contaminating the unprocessed film with fixer. Processing a sheet of film was taking about 30 minutes — now multiply that by a reasonable 5-15 shots from a day’s shoot, and processing film became a very daunting prospect, to the point that I still have some film in holders from more than two years ago that needs to be processed.

Looking into alternatives, I had read about the BTZS tube processing system, but it seemed expensive, and like more of a commitment than I was willing to make given how infrequently I process large format film. However, I came across another idea recently, and decided to give it a try: open-tube processing. The idea is not that you enclose the film and chemistry inside the tube for daylight processing, but rather that the tube is just there to keep the sheets of film from rubbing up against each other and scratching the emulsion as they’re processed in a darkroom. I acquired a piece of 2″ PVC drain pipe (about $8 at the hardware store), and cut it into four 7.5″ long pieces (with lots left over), drilling a few holes around the perimeter of each tube to see if I could avoid the water mark reported in the article where I’d first read about doing this. The holes are almost certainly superfluous, but they’re there, and they’re not hurting anything.

In any case, I recently processed ten sheets from Thanksgiving. It only took about two hours, which is a huge improvement. Processing is exactly like normal open-tray processing, but you fit the film into the tubes (emulsion facing inward) before the presoak, and I found that trays intended for 8×10 processing (actually about 12×10) are big enough to fit four tubes at a time. The tubes are transferred between trays like you’d expect, though I now use 100% agitation, rolling tubes against each other, to ensure even chemistry coverage. The only trick beyond the actual using of tubes that I’ve discovered is to shift each piece of film around inside its tube while in the water bath, so that there’s a thin film of water between the sheet and tube; this avoids the water mark. Once the film slides easily in its tube, you’re golden.

Of course, this speedy processing of film means that I can discover much more quickly just how much I have to learn about shooting with the 5×7 camera — I tried some fancy focal plane shifting tricks for these shots, and only some of them worked. The pictures were exposed and developed perfectly, but the focus… ugh. Some are better than others, but suffice to say that shooting large format is sufficiently different from shooting with an SLR or rangefinder that I can’t consider myself proficient yet. With everything zeroed and flat, I’m fine, but using swings and shifts? Lots to learn.

Must be time to go shoot some more 5×7, and get some learning done!

I had the opportunity recently to photograph and composite press shots for the Annex Theatre production of Is She Dead Yet?, a new show by Brandon J. Simmons. It’s a “white comedy” about the death of the last black person on Earth, based off the Euripedes show Alcestis.

For these shots, I worked closely with Evelyn deHais (Annex’s marketing director) who came up with the concepts, and did some light retouching on the images before they went out to press. Evelyn’s concept was that we wanted to call to mind the perfect-looking, bright cheery world you typically see in sitcom press photos. The images would show Aretha, the subject of the show’s title, in various situations, waiting while people around her are having a good time, getting on with their lives. The image that we both ended up liking best was the one we called “Cake,” which calls forward to the pink cake as an element of the play.

Here’s the picture, as I finished it:

cake-final-md-logo

What I find really cool about this picture is the way that it’s made: this is a composite of eight different pictures. Look at it again. That’s eight different photos, layered together.

The photos are, in no particular order:

* The background shot: table, walls, etc.
* Yesenia, in the red dress, center
* Shane, far left, with water in his wine glass
* Evelyn, behind Shane, with the cell phone
* The cake, a lemon-yellow frosted cake
* Soren, in the blue shirt, with water in his wine glass
* Paige, far right, with water in her wine glass
* The tablecloth, behind Paige and Shane’s legs

All photos, fortunately, could be shot in the exact same light (heavily diffused west-facing windows, in the afternoon sun), which makes the compositing effort much easier. I was also able to set up the camera on a tripod for many of the shots, which ensures that the camera’s point of perspective doesn’t shift in weird ways.

Because of people’s schedules, we had to shoot Yesenia (woman in the red dress) first, then everyone else a week later, and the cake and table follow-up shots after that. Fortunately, we had the four models around the table at the same time, so shadows and lighting are very realistic without having to go to extraordinary lengths.

Each person was then cut out to separate them from the background, using a layer mask in Photoshop. If you’re following along at home, the new trick I learned in this process is a way to deal with hair and masking: select the subject, getting the edges as good as possible, but don’t stress too much about the hair. Just get the hair close. Then, hit the Refine Edge button. At least for me, it always comes up in a mode where I get a brush pointer out over the image — use this brush to tell Photoshop where it should be doing Edge Detection. That is, brush around the hair areas, where you want to see background through the hair. Like magic, Photoshop just selects the hair and leaves the background cut out. Click OK then hit the Layer Mask button at the bottom of the Layers panel, and you’ve got a really good layer mask.

In any case, each person was cut out of their individual photo and layered on top of the background image. The front tablecloth picture and the cake were layered on last. The tablecloth picture allowed the entire room to be in focus, as well as the front edge of the tablecloth — photos like this are frequently shot and assembled in such a way that absolutely everything is in focus, so that was an element I concentrated on preserving.

One of the problems was that the cake needed to be pink, but I couldn’t find a pink cake at the store (we needed to keep costs down and the schedule was tight, so no fancy bespoke cakes for us). Instead I found a yellow one that was about the right kind of simple-and-elegant, so I shot it and modified the color with the Photo Filter adjustment layer. I did the same thing to the water in the wine glasses, giving them approximately the color of white wine.

Because these photos were all shot in the same light, this was also one of the easiest photos to put together. We did six total press shots, and my lack of compositing experience definitely came to the forefront in the more extreme ones — I tried faking “daylight” in the studio with a softbox and a reflector, but really didn’t get it right. Photos which use studio shots look distinctly more fake than the Cake photo, although they do accomplish the goal of looking like heavily composited photos. I also made the mistake of shooting my models against black, thinking I could use a blending mode to blend them into the scene. Instead I needed to cut them out from the background, and it would have been much easier with a white or green background.

The other thing that occurred to me is that I would ideally have two photo shoots: one to get the approximate shots done, without too much concern for costume or makeup, but focusing as carefully as possible on positioning models and matching the lighting I need. I would then attempt to composite mock-ups of the photos we wanted to do, using the real backgrounds. This would make abundantly clear where I’d gotten lighting or positioning wrong, and then in the second shoot we could concentrate on making those right, as well as getting costume and make-up spot-on. It feels like a school exercise, and I’m sure experienced composite photographers do the first step in their head before they even start (or would only do the double shoot in bizarrely ideal circumstances, due to time or budget constraints).

Overall, I’m pleased with how they came out, given my nearly complete lack of experience going in. I don’t think I’ll be offering to do commercial compositing shots any time soon, but I’m glad to dip my toe in.

IMG_2192

I won’t tell you how long it’s been since I last developed 5×7 film, because the number of (ahem) months is frankly a bit embarrassing. This is what I get for having no deadlines.

Regardless, tonight was productive: 8 of 12 exposed negatives processed. Once they’re dry, I can start scanning.

In case you’re interested, one of these negatives produces a scan of 12195 × 17073 pixels (roughly: the size changes depending on how closely you crop; those numbers are from a sample scan I did last year) at 2400 DPI. The scanner I have, an Epson V700, is capable of much greater resolution, but I kind of figure a 208 megapixel image is good enough to start with. Practically speaking, a 5×7 negative represents about 400 megapixels of data, depending on your film and development process.

So, you know, if you need all the megapixels, large-format is a good choice.

In my path to becoming a well-rounded photographer, I decided I needed to have a little bit of product photography under my belt. The next step on this path was to tackle a difficult subject: metal.

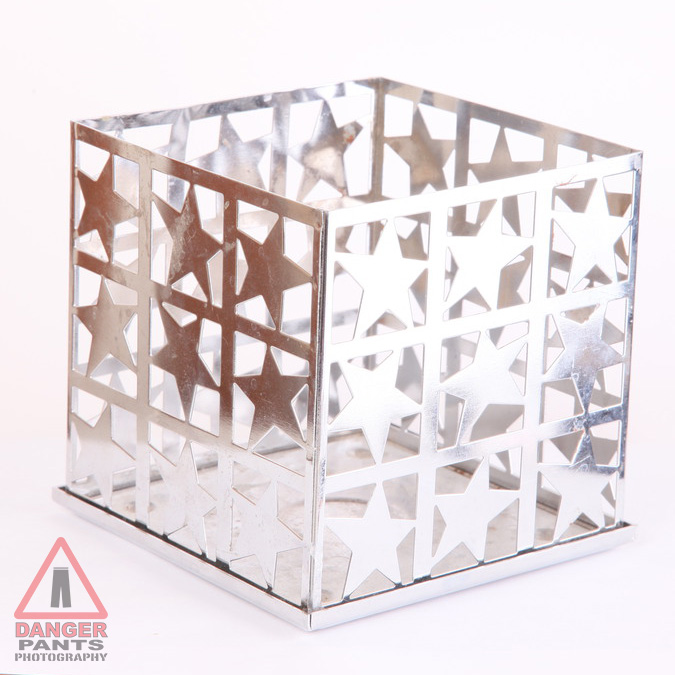
Photographing metallic objects is hard because the light is comparatively difficult to get right. It’s easy enough to throw up some light and end up with a picture. However, that picture will be flat and uninteresting, and probably won’t look much like metal. We’ve got a visual vocabulary for metallic objects now, after a hundred and fifty years of photography, and thousands of years of painting. You expect to see the metal object show a range of tones from near black to near white. Color doesn’t really look right, unless it’s a very lightly tinged blue color. You typically want to see a curving line, if you see a line at all, where light and dark meet on a smooth surface. Here’s an example of not doing it right:

img_9005

There are too many bright tones, and no real dark tones to speak of. The left side is showing a distinct orangey color from the wall and the shades. I also didn’t realize how dirty my product was until after I reviewed the first batch of photos. It still looks like metal, but it doesn’t look very good. This was with two lights, and was the first shot I took of this object.

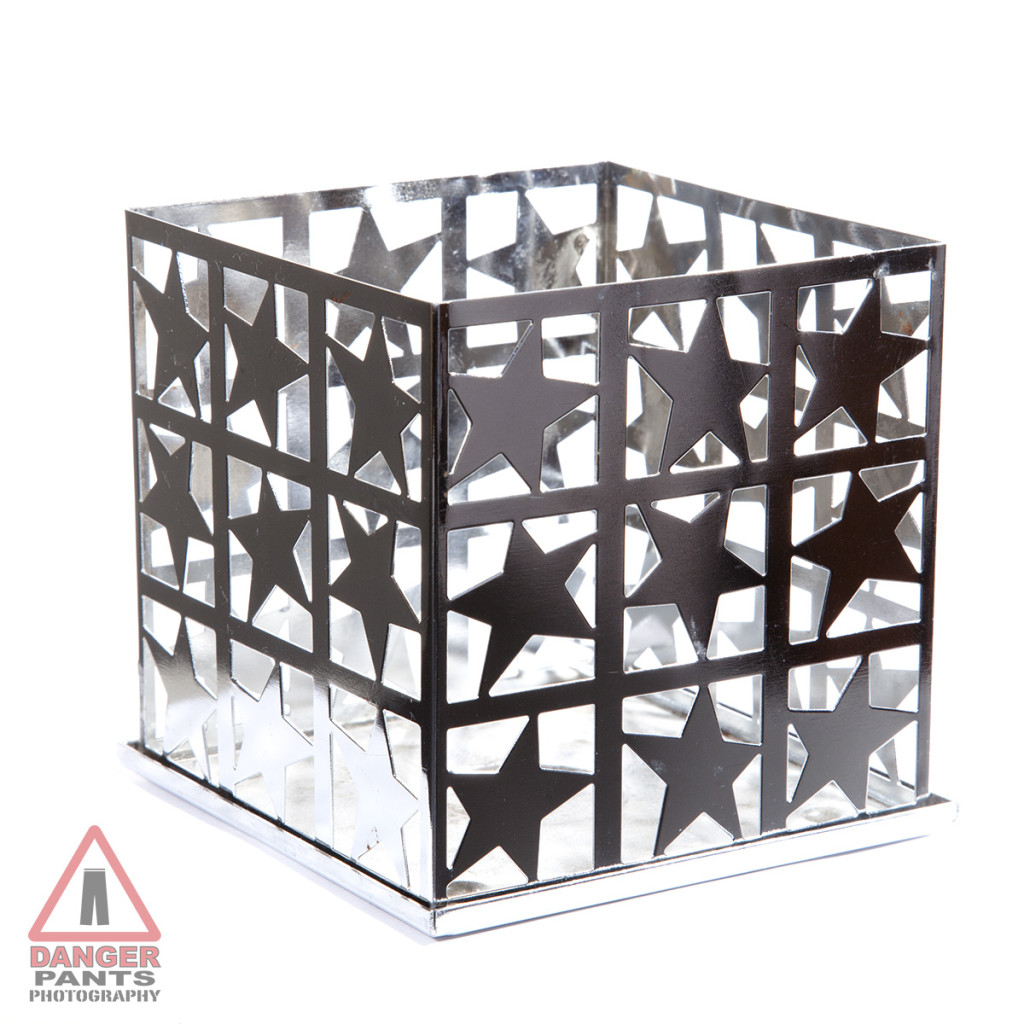
I went through a series of photos after this, moving lights, removing umbrellas, moving again, shifting camera angles, cleaning my subject, eventually adding lights until I had every strobe I own trained on the thing. I finally had a result I was pretty happy with (although ideally I would clean more of the wax off of it):

IMG_9038

It looks like metal. It has a bit of a highlight on the otherwise-dark side. It’s cleaner.

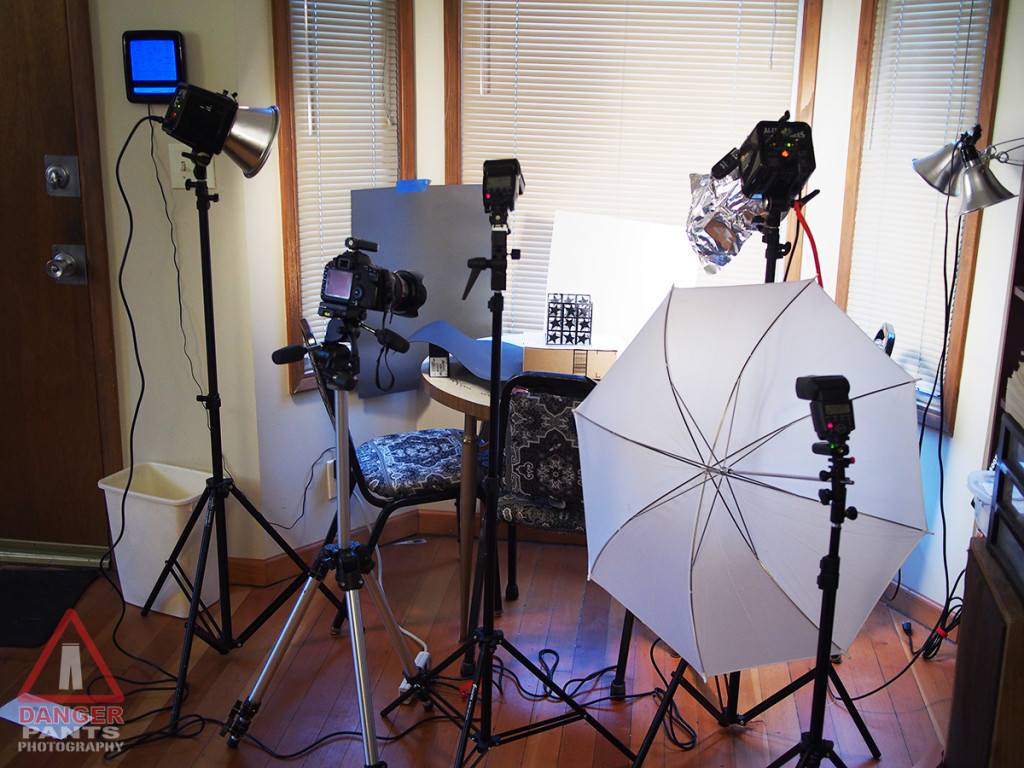
And the inspiration for this whole post? The crazy-looking setup it took to get here:

OLYMPUS DIGITAL CAMERA

Although I’ve been focusing on people for most of my photography career, I also find myself occasionally tripping past other types of photography and looking in as I go by. One of those is product photography.

Product photography is an interesting area, since it looks so simple from the outside, and can be challenging to really get right. It’s not hard to take a picture of a widget. It’s much more demanding to take a picture of a widget and make it look both correct and appealing. Lighting has to be very particularly set up, and the needs of the customer can radically change the shot — is this a catalog shot? A marketing shot? What is the goal of the marketing campaign? The look for a bottle of hair product may or may not be utterly different from the look for a handgun. It’s hard to imagine lumping those products together, but I could easily imagine a lighting and background setup that would accommodate either.

My first attempt at a product shot demonstrated just how hard it is. I borrowed a decorative toy bird from a friend, since I wanted something whimsical, and my own possessions didn’t yield anything I’d want to call a portfolio shot of a whimsical thing. I shot it against a brightly colored background (boring), and against a colored background with glittering faux jewels strewn around (more interesting, but definitely not right). The lighting was ok, but the setting was just kind of bleh.

Then one morning I awoke to an inch or two of snow, and immediately knew the solution to my dilemma. I grabbed the bird, and perched him on a handy railing. Instantly, an interesting, evocative shot. Snow underneath, trees forming the out-of-focus backdrop; it was ideal.

Are those rockers or skis?

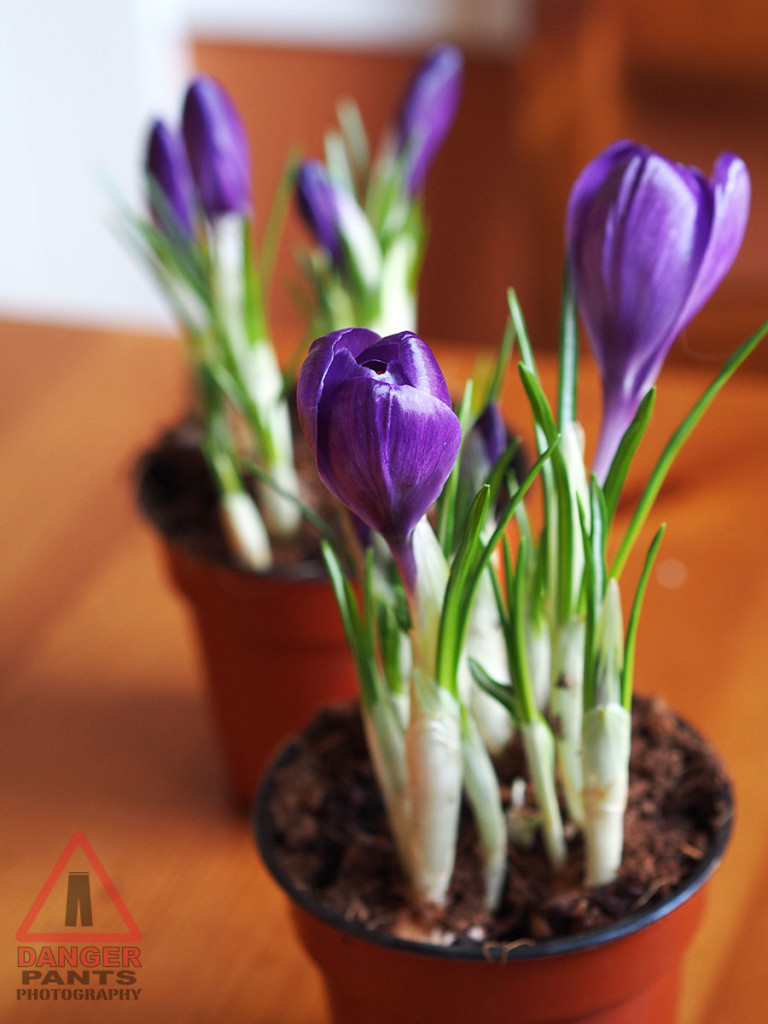
Next up, I was approached about taking pictures for an Amazon web store. Amazon allows resellers to list their stuff through the Amazon site, as you probably know. But the product photography isn’t included, and the quality of images ranges from professional to abysmal. This request was for a nursery which sells bulbs that grow into lovely flowers, and we had some fresh-sprouted flowers to photograph. I had a camera with me, and the light was pretty nice, so I took some photos of the flowers in-place.

Boekee's Nursery

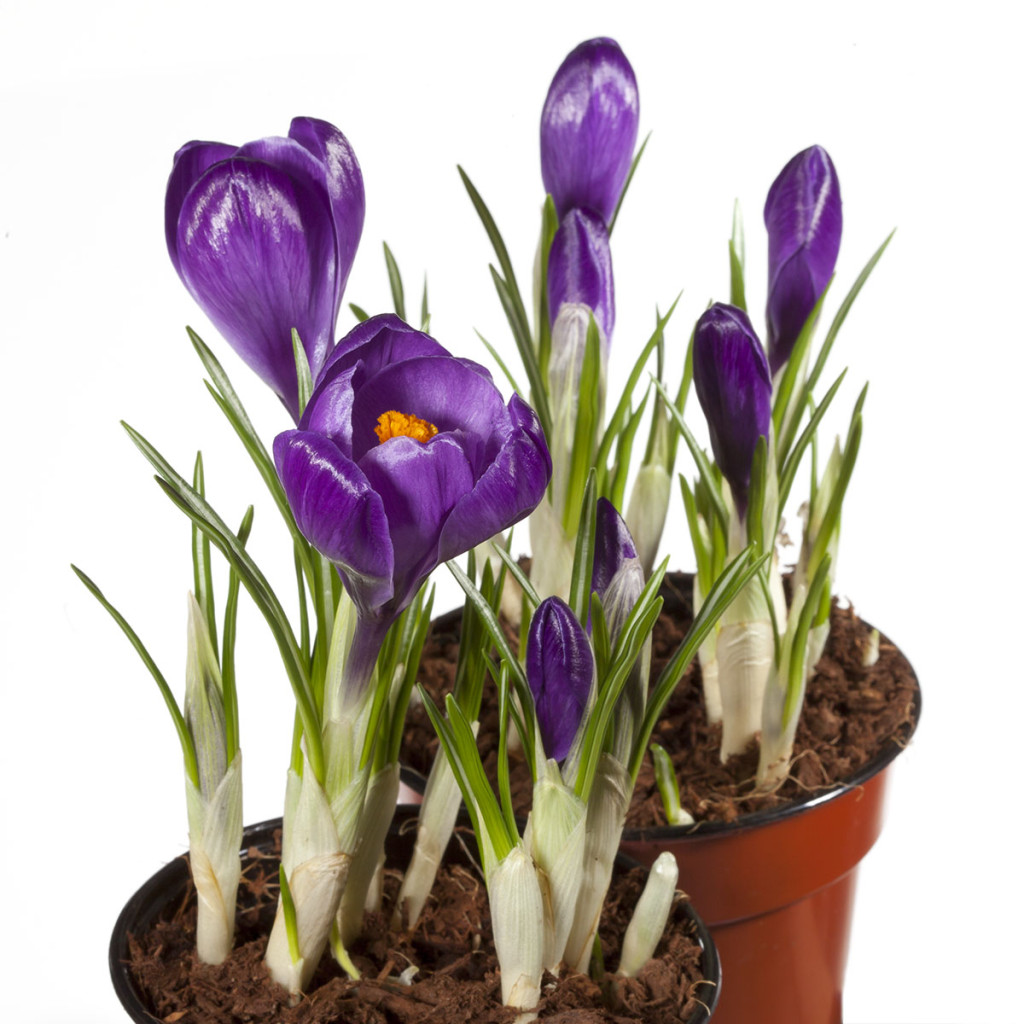
That’s a great picture, but it’s not really appropriate for selling a bulb on Amazon. That is to say, it would be a good marketing photo (where the message is, “Our flowers will add beauty to your home,” more or less). It’s not a good catalog photo. For a good catalog photo, you just want to see the product, without any distractions. It should allow the viewer to mentally swap in their own house or flowerbed with the minimum of work. The standard vocabulary for this is to have a white background.

Boekee's Nursery

The distinction between marketing and catalog shots is actually an interesting one, and one that I hadn’t really considered until taking these last two images. Both are good photos, but the difference between them is quite clear to me now that I’ve given it the thought.

Anyway, this is an interesting direction, and one I’d like to see happening more. There’s a temptation to say that this is a good way to generate revenue through photography, but I have a feeling that it’s also an interesting form of artistic expression in its own right, which I’ve only dipped a toe into so far.

My friend John Ulman wrote this fantastic top-10 list that you might enjoy:

10 Tips for a Great Headshot, by John Ulman

Share and enjoy!

OLYMPUS DIGITAL CAMERA

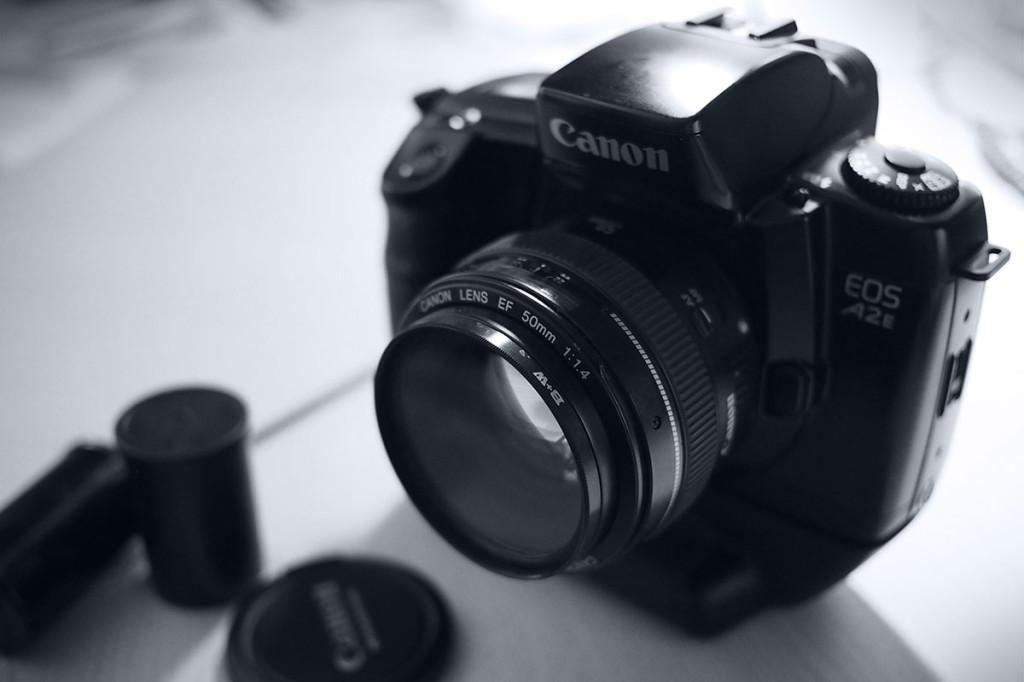
I was wandering through Value Village the other day, and spotted this big, pro-looking SLR in the display case. I took a closer look, and noted the model number. Next time I hit a computer, I looked it up, and it looked interesting. And Value Village was asking $60 for it, which was roughly on par with what KEH was asking (if they’d had any in VG condition, which they didn’t). Plus it had the accessory vertical grip. What the hell, thought I. So I bought a Canon EOS A2e 35mm film camera.

I just got back from my first brief session with a 35mm film camera in years. I only took 10 pictures, which is a shocking change from my digital habits. Thinking of that $5 roll of film in the camera dramatically changes my priority. It’s very interesting to work within that limitation again. I grew up shooting film, so this habit is nothing new. It’s just that I’ve been utterly spoiled by digital cameras, where even shooting RAW, I’m able to take many hundreds of photos before I have to think about storage space.

So now of course I’ve got thoughts of setting up my full darkroom again (I held onto all the equipment, figuring I might get interested again), and like some kind of gateway drug, it’s now ok in my brain to go troll through Ebay looking at crusty 35mm rangefinders and funky old cameras I never would have considered even a few days ago. It’s like a kind of madness.

Time to go home, mix up a fresh batch of XTOL, and see what I’ve got. It’s odd, disconcerting, and surprisingly calming to be back.