
User's Guide for the Dangerpants Labs Air Data Instrument
Written by Laura Johnston
Posted July 24, 2011
Updated February 20, 2014

Introduction
Congratulations on your construction of the Dangerpants Labs Air Data Instrument (ADI)! This instrument uses a handful of commonly-available components and custom software to make a lightweight, small, power-efficient device which replicates the functions of the following instruments:
- Altimeter
- Airspeed indicator (true airspeed, not indicated)
- Vertical speed indicator
- Thermometer
- Clock
Important Disclaimer
|
The Dangerpants Labs ADI is NOT FOR USE ON AIRCRAFT. See the full disclaimer for more information. |
Installation
Insert diagram of normal installation here
The ADI requires three external inputs: 7-30V DC-in, pitot-in, and static-in. Depending upon how it was constructed, static-in may be provided internally rather than requiring an external connection.
Pitot-in should be connected to a properly installed pitot tube. Installation of pitot-static systems is covered in numerous aircraft homebuilding publications and websites (such as this one from ch601.org).
Static-in should be connected to a static air source. If you don't know where to find an accurate source of static air on your vehicle, it is usually reasonable to leave the static-in connection unconnected. If static-in is left unconnected, ensure that the case is vented through a hole at least 3mm or 1/8" in diameter
DC-in should be connected to a reasonably clean source of DC power, between 7 and 30 volts. Any 12V or 24V vehicle electrical system should work well. The ADI should be powered through a 100 mA quick-blow fuse inline with the power cord.
Operation
The ADI presents a flash screen on power-up. During this time, data-smoothing buffers are being populated. The flash screen includes the firmware version number, in case you need it for debugging.
Insert shot of splash screen in progress here
The ADI has been designed with ease-of-use in mind, and you shouldn't need to refer to this guide in normal use.
Normal Operation
In normal operation, the ADI simply shows its normal display. With the exception of occasionally updating the Kollsman value, there is no need to interact with the ADI.
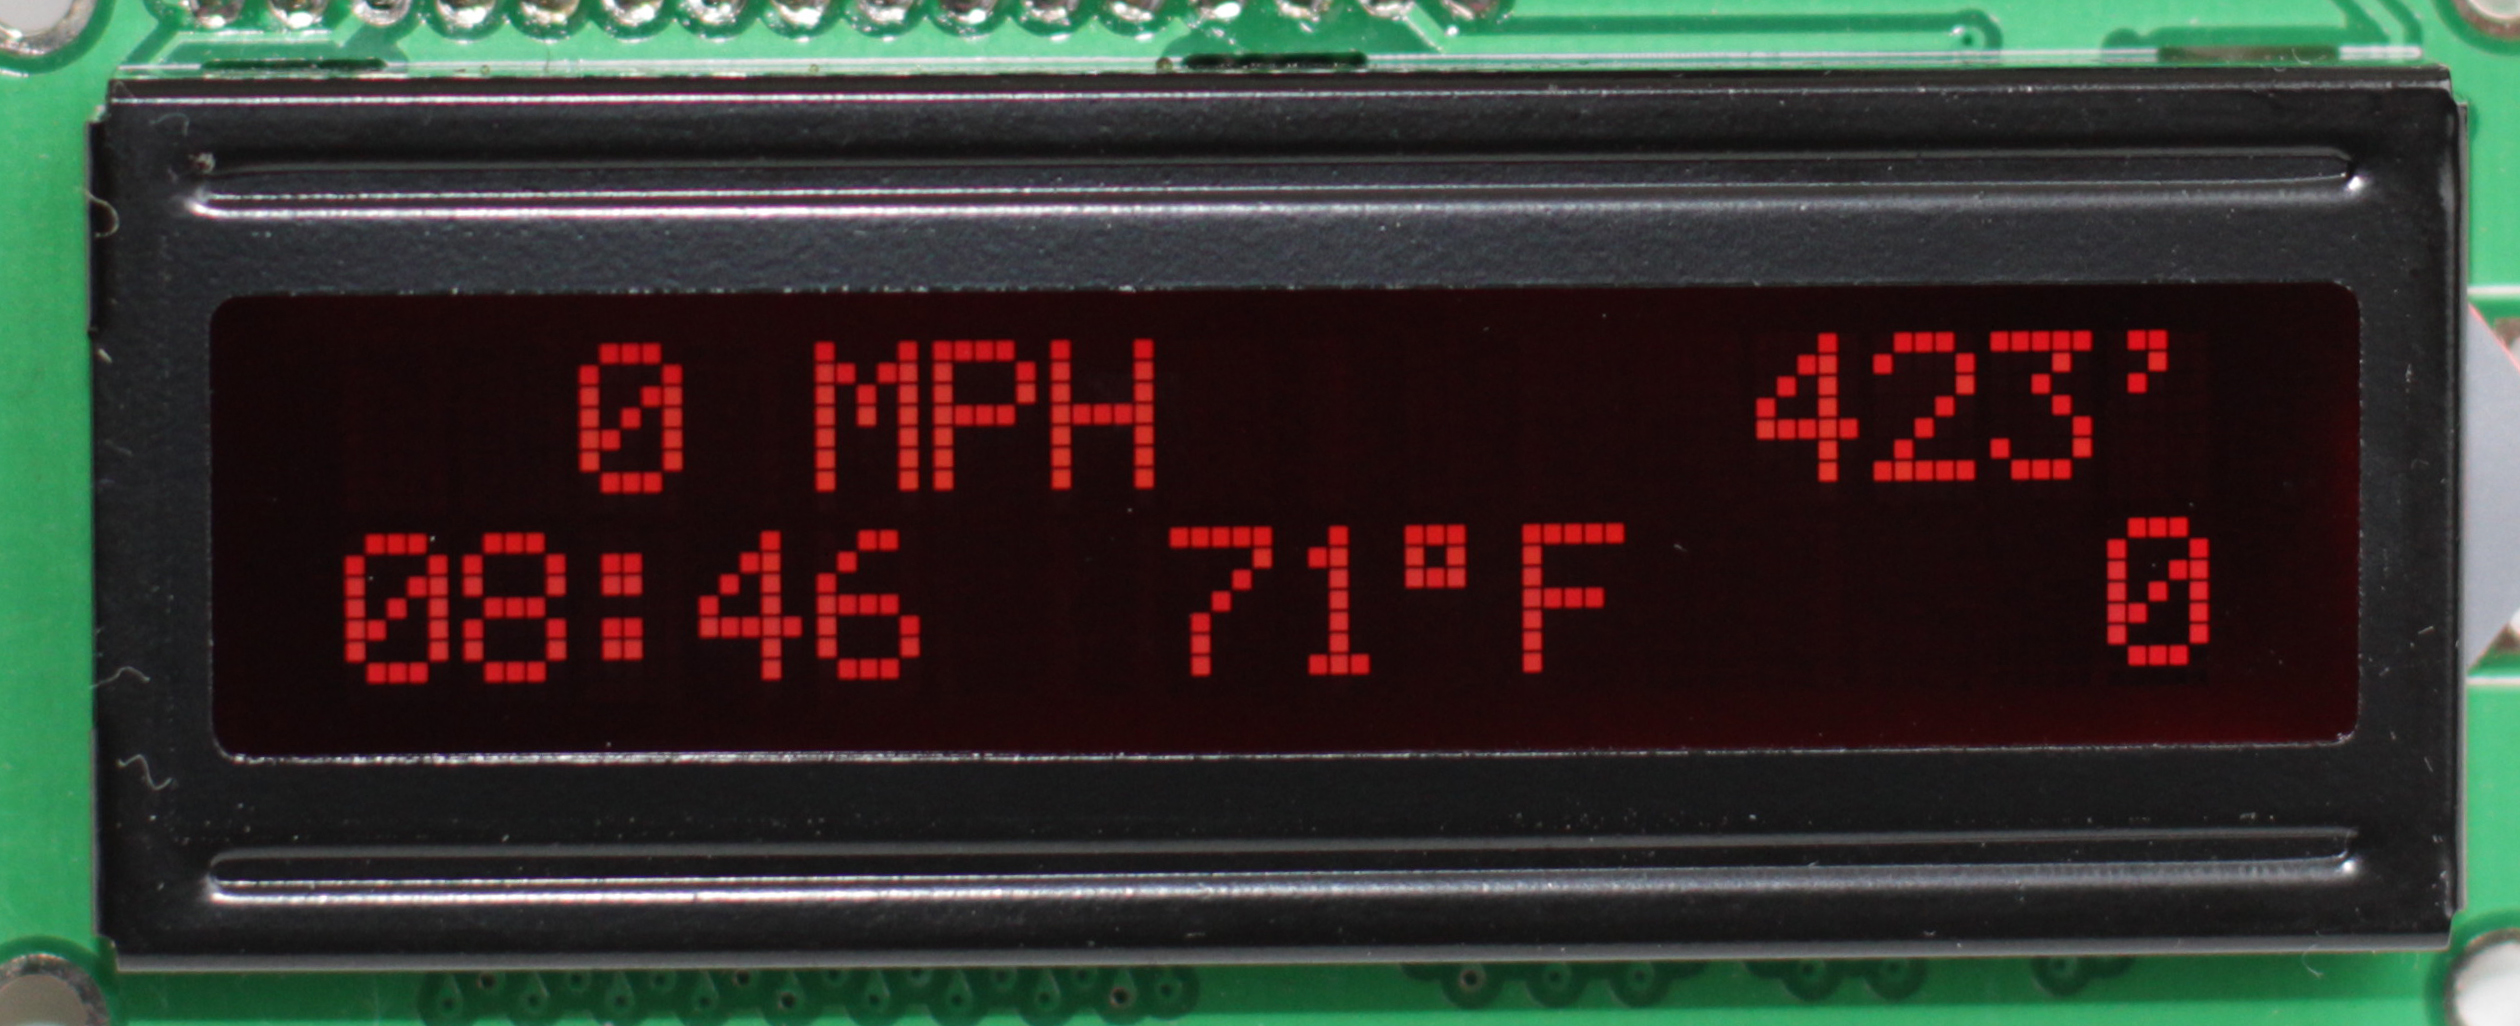
The normal display shows true airspeed and altitude on the top line, and clock, temperature and vertical speed on the bottom line, as shown here:
When you do interact with the ADI using the SET button, simply leave the unit alone, and it will revert to the normal display. The menu timeout can be set to any number of seconds; see Setting the Menu Timeout below. Note that the + and - buttons have no effect outside the menu screens.
Interpreting the Display
Airspeed: The airspeed is displayed in true (temperature-compensated) airspeed, not indicated airspeed. If you require indicated airspeed, the firmware must be modified and recompiled; see the Construction Guide. The airspeed display is on a 1.6-second data-smoothing buffer, and thus has a short lag when reacting to rapidly changing airspeed.
Altitude: Displayed altitude is dependent upon the current atmospheric pressure. Current sea-level pressure (see Determining the Kollsman Value below) may be set in the menu system. Altitude is also on a 1.6-second data-smoothing buffer.
Clock: The clock is of the 24-hour type (13:00 = 1 PM, etc.) favored by aviators. There is currently no option to switch the clock type.
Temperature: The temperature sensor is part of the barometric pressure sensor. As a result, the displayed temperature is the temperature of the unit itself, and should not be confused with Outside Air Temperature. If the unit is installed in a heated cabin, it will display the current cabin temperature.
Vertical speed: The vertical speed display is derived from the altitude information, and is similarly on a 1.6-second data-smoothing buffer. Although it reacts instantly to changes in altitude, the reading isn't completely accurate until a steady rate of descent or ascent is established. Although no units are displayed for VSI, they are consistent with the current Units setting (see Setting the Display Units below).
Setting the Kollsman Value

Pressing the SET button once will enter the menu system. The Kollsman value is the first menu item every time the menu system is activated. Use the + and - butons to change the Kollsman value up or down. Altitude is displayed in brackets next to the Kollsman value, and if you know your current altitude (such as at commonly-visited locations), you can set the Kollsman value accurately by adjusting for your altitude.
The Kollsman value tells the altimeter code how to translate the current barometric pressure to altitude, and is the current surface-level pressure measurement at sea level.
Determining the Kollsman Value
The current Kollsman value may be determined by consulting METARs, available from aviationweather.gov. Find a local airport's code at sites such as world-airport-codes.com. Kollsman values are typically updated every 100 miles or every hour in an aircraft, and this is a good guide if you want to maintain an accurate altitude display.
If you have a receiver capable of receiving AM in the 118-136 MHz range (such as a scanner or handheld aircraft-band radio), you may also be able to listen to ATIS and AWOS broadcasts from local airports. Frequencies for these broadcasts are available from sites like airnav.com
If you know your current altitude (keeping a list of altitudes at commonly-visited locations may help), you can adjust the Kollsman value until your current altitude is displayed, rather than looking it up or listening to ATIS broadcasts.
Setting the Display Units

The Dangerpants Labs ADI is capable of displaying its data in either US or Metric units. Press the SET button until Units is displayed. Use the + or - button to switch between US and Metric units.
Units are as follows:
| US | Metric | |
|---|---|---|
| Airspeed | Miles per hour (MPH) or Knots (KNT)* |
Kilometers per hour (KPH) |
| Altitude | Feet (') | Meters (m) |
| Vertical Speed | Feet per minute (FPM) | Meters per second (m/s) |
| Temperature | Degrees Fahrenheit (°F) | Degrees Celcius (°C) |
* US speed units may be set to Knots at compile time. See airspeed.h, and uncomment the line "#define USE_KNOTS". By default, the firmware displays MPH.
Setting the Clock
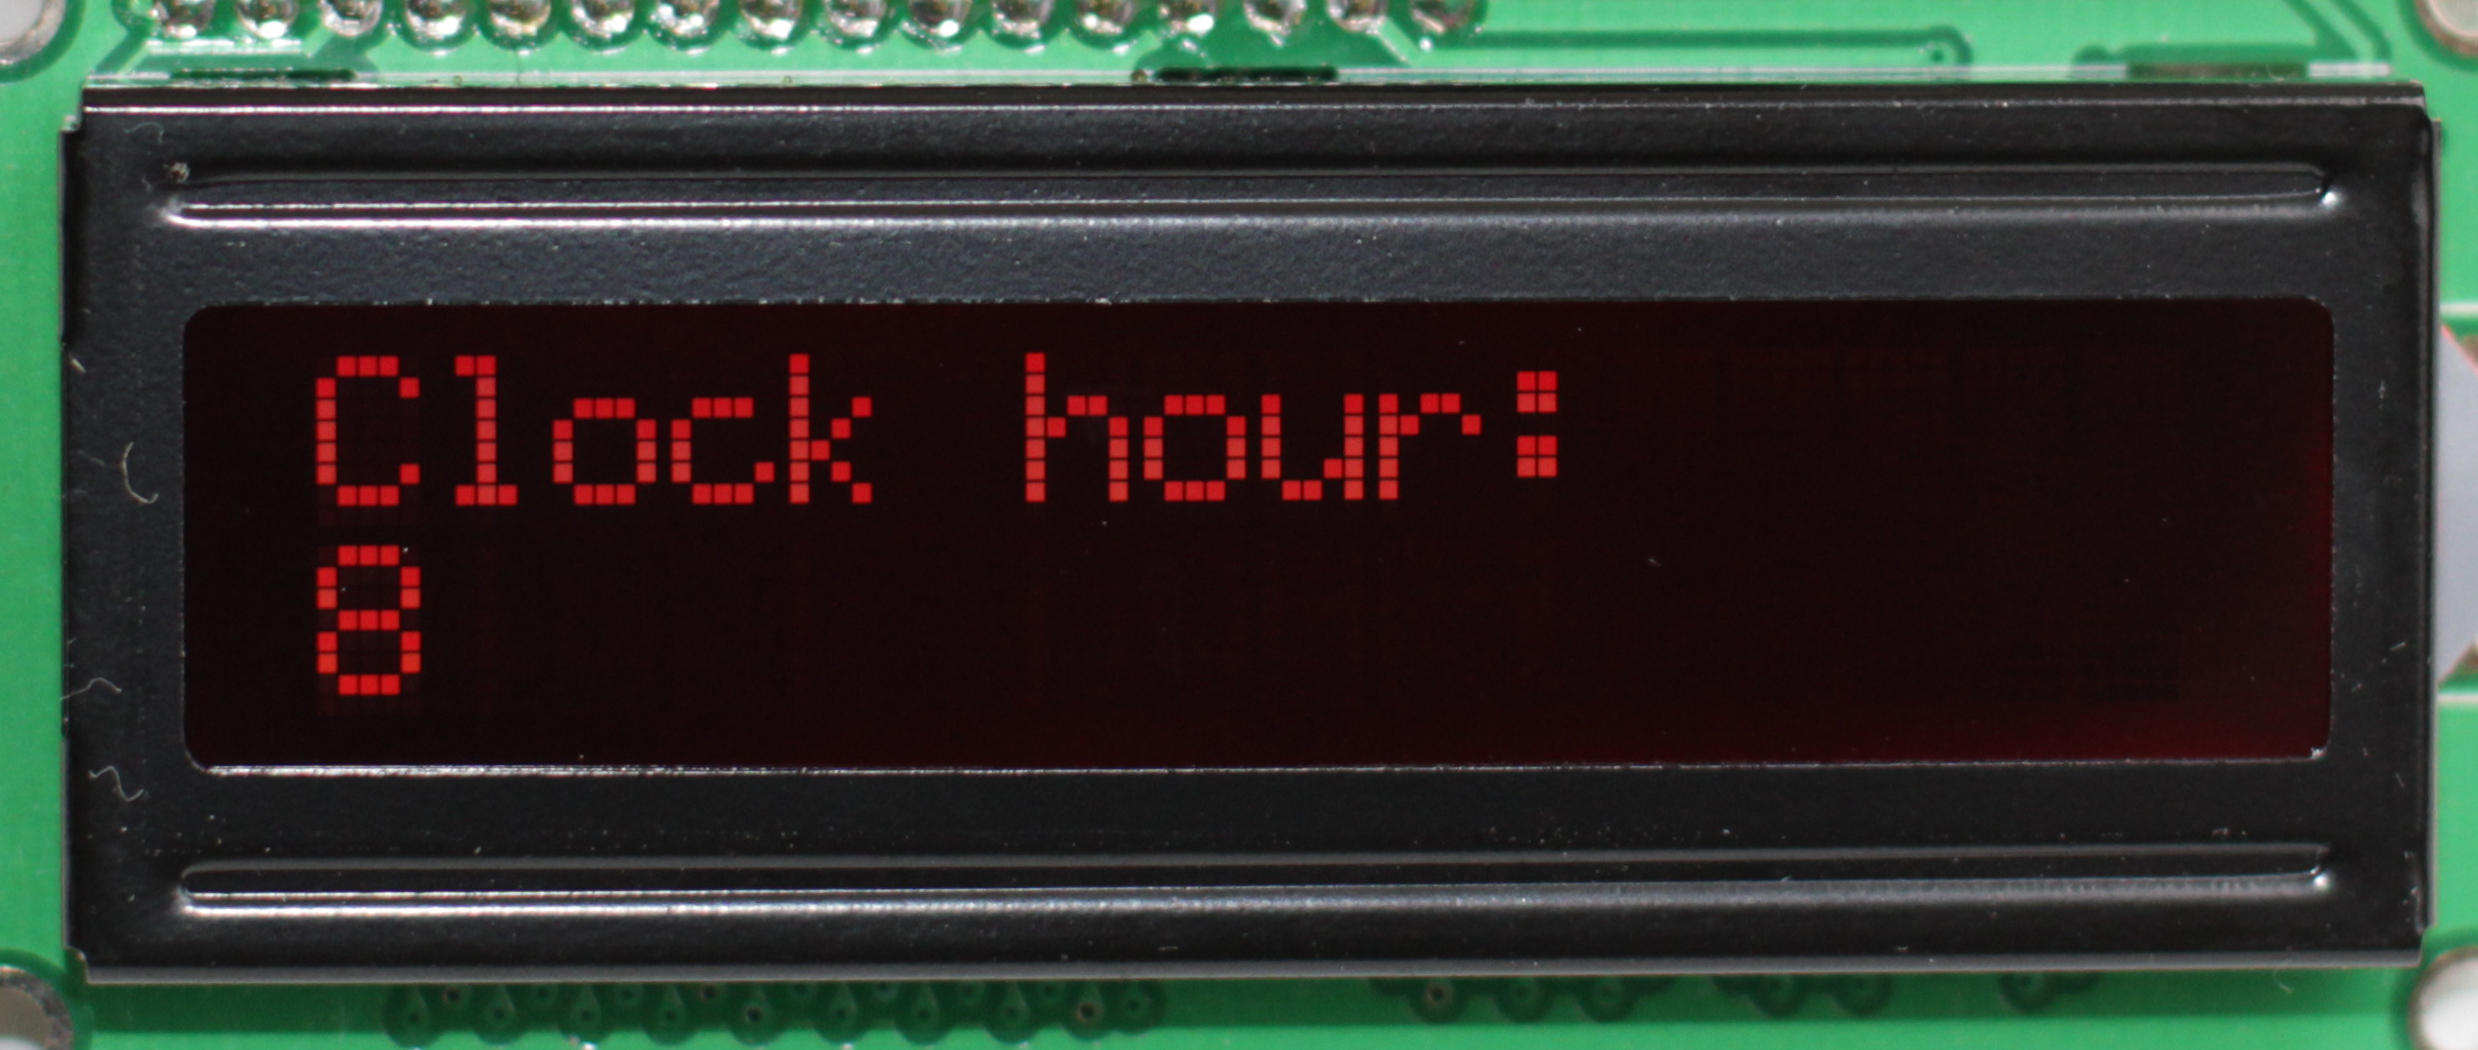

Press the SET button until either Clock Hour or Clock Minute is displayed. Press the + and - buttons to adjust the value. Every change to either minutes or hours resets the seconds count to zero.
If this is a secondary data source in your vehicle, it may be convenient to set it to an alternate time zone, such as UTC.
The Real Time Clock unit in the ADI includes a 2032 coin cell battery, which should last several years. When this battery becomes depleted, the clock will cease keeping time accurately, and the system may become unstable.
Setting the Backlight
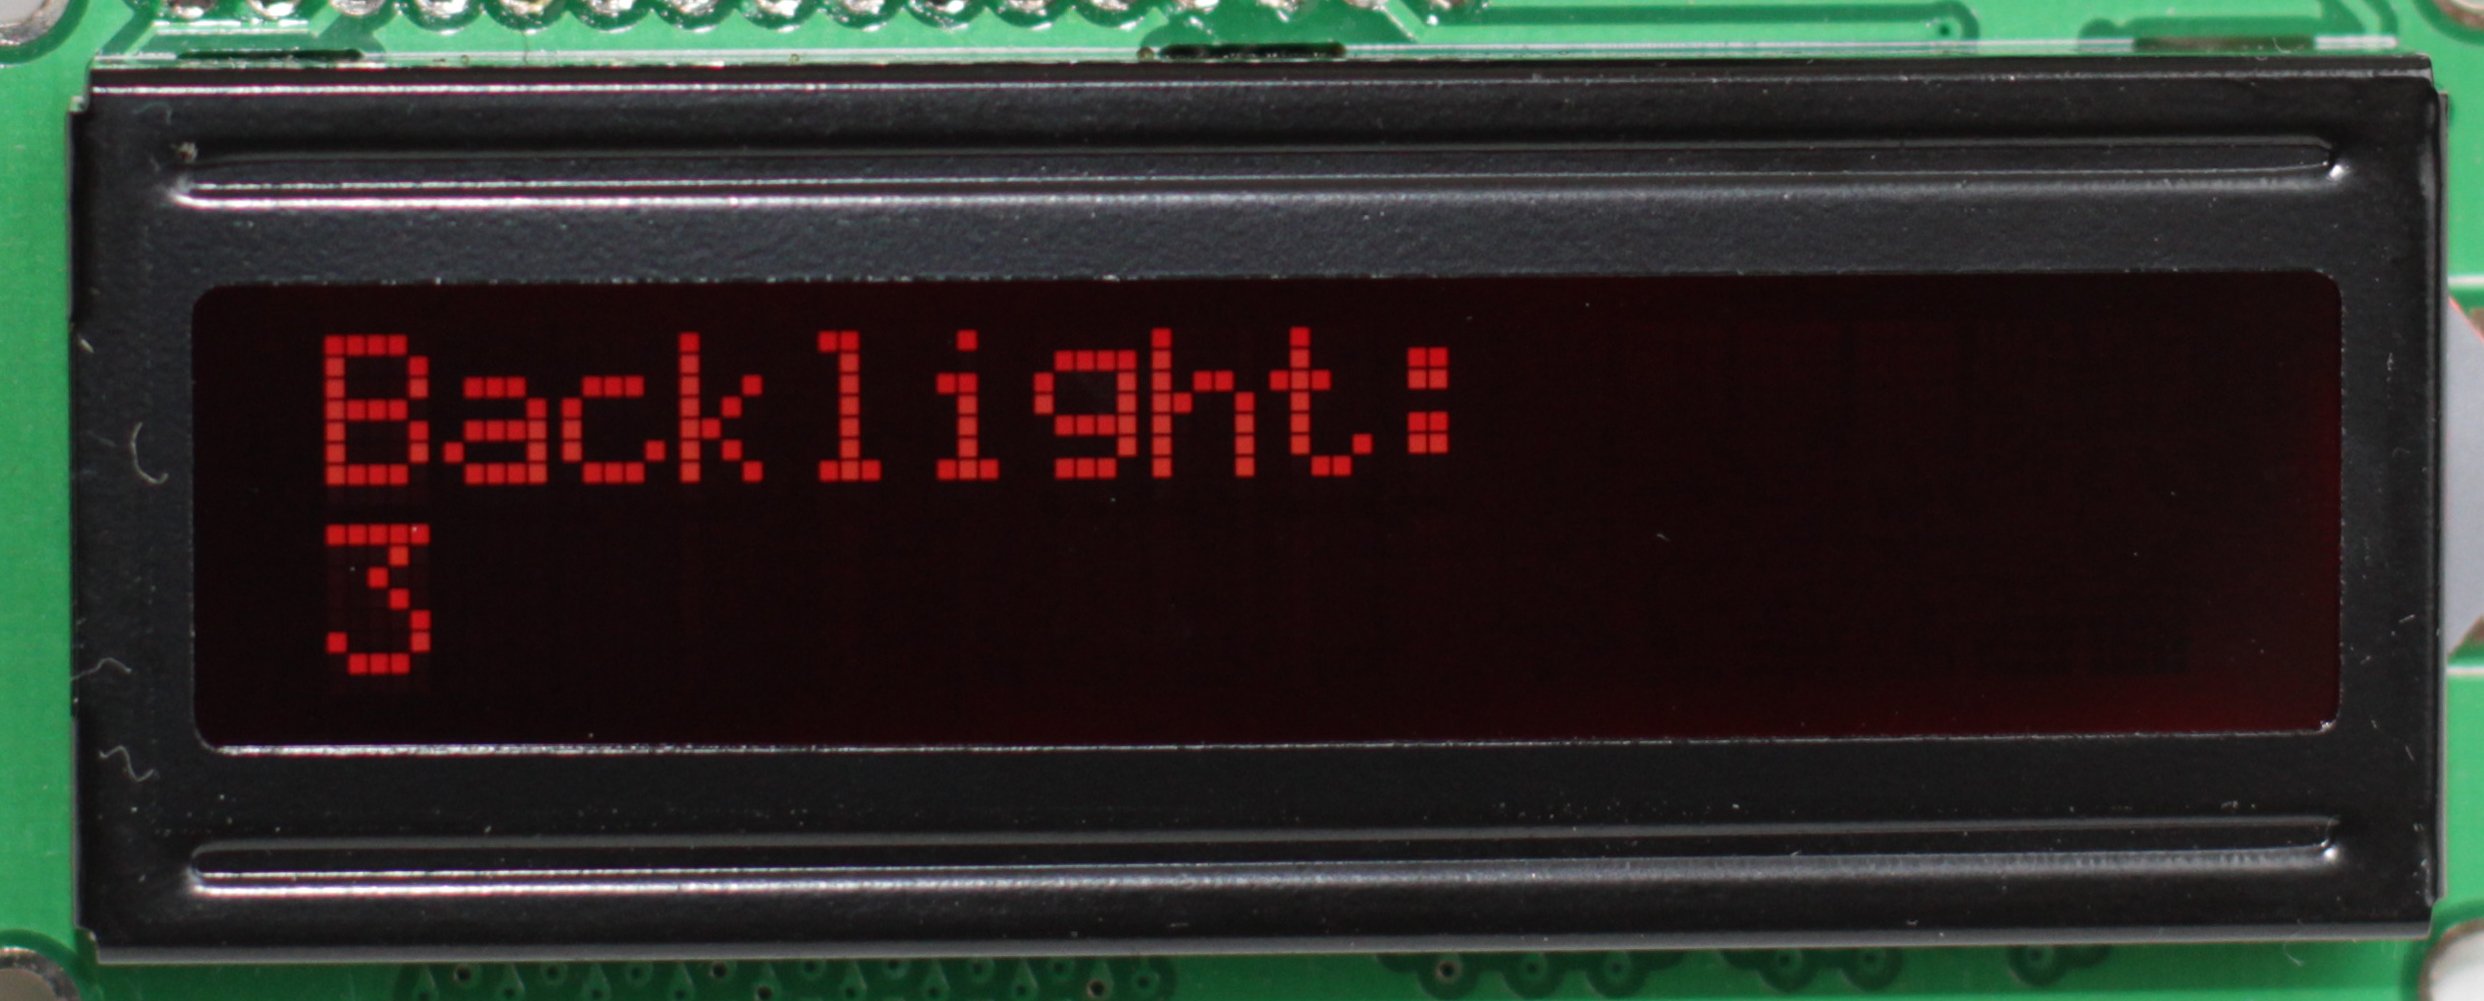
Press the SET button until Backlight is displayed. Use the + and - buttons to change the backlight level. Backlight is adjustable from 0 (off) to 5 (full power).
Setting the Menu Timeout

Press the Set button until Menu Timeout is displayed. Use the + and - buttons to change the timeout in seconds. This determines the number of seconds after the last button press the ADI will wait before it reverts to the normal display from the menu system.
Setting the Speed Offset

Press the SET button until Speed Offset is displayed. Use the + and - buttons to change the value. This number represents the number of volts from the MPXV5004DP which should be interpreted as zero airspeed. The number is variable depending upon the individual sensor and ambient conditions. Freescale says it's supposed to be 1.0, but the prototype requires about 1.163 to read zero with no pitot pressure input.
Calibrating the Speed Offset
If your ADI displays zero airspeed even when moving, adjust the number down. If it shows some airspeed even when perfectly still (ensure there's no wind causing the higher reading), adjust the number up. The airspeed preview is not terribly accurate, but will give you some idea what your current setting will do. The correct Speed Offset setting is the highest setting that gives a zero speed reading without fluctuating.
Maintenance
The Dangerpants Labs ADI only has one regular maintenance item: every few years, the Real Time Clock battery should be changed. The manufacturer doesn't list a specific interval beyond "several years," so to maintain correct function, we recommend changing the battery at least every two years in installations where the ADI must always function correctly.
If the clock battery dies, it has the potential to render the ADI inoperative. The clock battery is only used when the ADI is powered off, so if your ADI is up and running frequently, your clock battery will last correspondingly longer. No permanent damage will occur if the battery is allowed to expire.
The sensors in the ADI should continue to operate for many years without problems. However, as with any pitot-static system, care must be taken to keep the pitot tube free of debris or insects, and the static ports must not be painted over.
If the ADI was built to be battery powered (see the Construction Guide), a set of 2500 mAH alkaline or NiMH AA batteries should theoretically last about 16 hours, although in practice you should only count on 5-10 hours out of a charge. Backlight level significantly affects the ADI's current draw, so turning it down will allow the batteries to last longer.
Troubleshooting
This troubleshooting guide assumes that you started with a functional ADI, and that there are no fundamental problems with the construction of the device.
No display
Ensure that there's power to the unit. Power and CPU function can be confirmed by looking for the built-in LED flashing on the Arduino board. Use a flashlight to ensure that the LCD isn't displaying anything. Under some conditions, when backlight power is off the display can look blank.
SET button not responding
Cycle power to the ADI. The prototype has been known to become unresponsive when running for long periods of time (over 24 hours). If this doesn't work, check the connections between the SET button and the Arduino board.
Unit stuck in the menu
Check that the menu timeout isn't set to a high value. The timeout determines the amount of time after the last keypress before the ADI switches back to the normal display. Dangerpants Labs recommends around 5 seconds for the menu timeout.
Airspeed incorrect
Check the Speed Offset calibration. See Calibrating the Speed Offset above.
Altitude incorrect
Update the Kollsman value to current. Kollsman values are only valid for short periods of time, typically less than an hour depending on local conditions. See Setting the Kollsman Value above.
System behaving erratically; clock inaccurate
The Real Time Clock module in the ADI includes a 2032 coin cell battery. It should last several years, but when it becomes depleted, the clock may cease keeping accurate time. The ADI itself may also become unstable in this case, working incorrectly or not at all. The system will not work correctly without a charged battery.